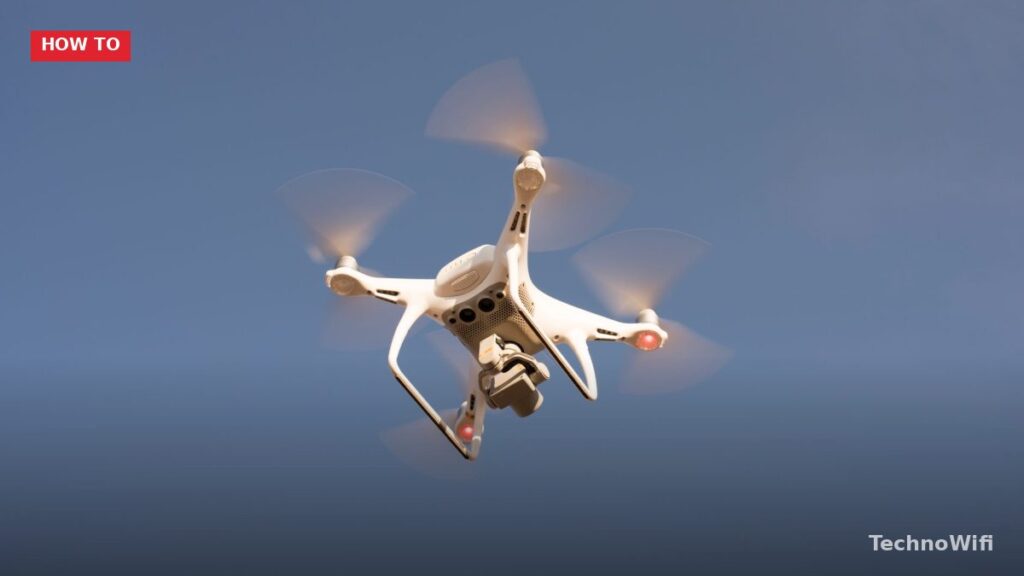
A drone camera is basically a quadcopter with a gimbal-mounted camera that you fly from the ground using a controller paired with your phone or tablet for the live feed. The controller handles flight (altitude, direction, speed, rotation) while the app or dedicated buttons handle camera functions like photo, video, gimbal tilt, and exposure. The learning curve is smaller than you’d think. Today’s consumer drones from DJI, Autel, and other brands come loaded with GPS stabilization, obstacle avoidance, and automatic return-to-home features that make crashing genuinely hard. Your first flight is really about building smooth habits that produce footage you can actually use.
How Drone Camera Controls Work
Every drone controller has two joysticks and a handful of buttons. The sticks control four axes of movement, and knowing what each one does before takeoff saves you from the panicked overcorrections that ruin beginner flights.
| Stick | Direction | Movement | What happens when you let go |
|---|---|---|---|
| Left | Up | Throttle: drone climbs | Holds current altitude |
| Left | Down | Throttle: drone descends | Holds current altitude |
| Left | Left | Yaw: nose turns counterclockwise | Holds current heading |
| Left | Right | Yaw: nose turns clockwise | Holds current heading |
| Right | Up | Pitch: drone flies forward | Stops and hovers |
| Right | Down | Pitch: drone flies backward | Stops and hovers |
| Right | Left | Roll: drone slides left | Stops and hovers |
| Right | Right | Roll: drone slides right | Stops and hovers |
Here’s the key difference: the left stick sets a state. Your altitude stays where you put it, and your rotation stays where you turned it. The right stick commands movement that stops the moment you let go. Once new pilots get this, they realize they don’t need to “hold” the drone in the air. Just stop touching the left stick and it hovers on its own.
Most controllers also have a gimbal dial (a wheel or slider) on the upper left that tilts the camera up and down. You’ll find a shutter button on the upper right for photos and a record button for video. On DJI controllers, the C1 and C2 buttons are customizable. A lot of pilots set C1 to center the gimbal and C2 to toggle between photo and video mode.
Pre-Flight Checklist for Your Drone Camera
Skipping these steps is how drones get lost, damaged, or confiscated. Run through them before every single flight.
- Check battery levels on both the drone and the controller. Most drones need at least 20-25% battery for a safe return-to-home. Don’t take off below 50% unless you’re doing a quick shot within visual range.
- Wait for GPS lock. You want 10 or more satellites showing in the app before you launch. Flying without GPS lock turns off position hold, return-to-home, and geofencing. The drone gets way harder to control and can’t find its way back if you lose signal.
- Set your return-to-home altitude. This is how high the drone climbs before flying back to the takeoff point when it loses signal or the battery gets low. Set it higher than the tallest obstacle nearby. If there are 40-foot trees around, go with 50 meters (about 165 feet). Most DJI drones default to 30 meters, which is too low anywhere with tall trees or buildings.
- Check for flight restrictions. Open your drone’s app (DJI Fly, Autel Explorer, etc.) and look at the map overlay. Red zones are no-fly areas around airports, military bases, and national parks. Yellow zones need authorization. In the US, recreational pilots should also use the FAA’s LAANC system (available through B4UFLY or Aloft) to get automated airspace clearance in controlled zones.
- Inspect the propellers. Check for cracks, chips, or bends. A damaged prop creates vibration that the gimbal can’t fix, and your footage will look jittery. Props are cheap. Replace them at the first sign of wear.
- Calibrate the compass if the app tells you to. This usually pops up when you’re flying at a new location for the first time. Follow the on-screen steps to rotate the drone horizontally, then vertically. Don’t calibrate near metal structures, parked cars, or concrete with rebar, as they mess with the magnetometer readings.
Flying a Drone Camera for the First Time
Find an open field or park with no people, vehicles, or overhead wires. Grass is your friend because it cushions rough landings. Skip windy days for your first few flights, since anything over 10 mph makes control noticeably harder.
- Takeoff: Place the drone on flat ground with the camera facing away from you. This way, pushing the right stick forward actually moves the drone forward (left is left, right is right). Power on the drone first, then the controller, then the app. You can either use auto-takeoff in the app or push both sticks down and inward to start the motors, then gently push the left stick up. The drone will climb to about 4 feet and hover.
- Altitude control (first exercise): Climb to 10 feet, then drop back to 5 feet using only the left stick. Repeat 5-6 times until the movement feels predictable. Small inputs create smooth, slow movements. Big inputs create fast, jerky ones that ruin your video.
- Rotation (second exercise): Hover at 10 feet and practice yawing left and right with the left stick. Do a full 360-degree rotation, then rotate back. This helps you build your sense of which way the drone is pointing, which matters because forward and backward on the right stick are always relative to the drone’s nose, not to your position.
- Forward and back (third exercise): With the drone facing away from you, push the right stick gently forward. The drone moves away. Pull it back. The drone returns. Practice flying out 30-50 feet and coming back while keeping your altitude steady.
- The orientation test (fourth exercise): Rotate the drone 180 degrees so it faces you. Now push the right stick forward, and the drone flies toward you. Push right, and it moves to your left. These reversed controls are the hardest thing for beginners. Keep practicing until it feels natural, because the drone will inevitably end up facing you during real flights.
- Landing: Fly the drone back over the takeoff spot at about 6-8 feet. Slowly pull the left stick down. Most drones have landing sensors that slow the descent in the final 2-3 feet. Once it’s on the ground, hold the left stick all the way down for 2 seconds to kill the motors. Or just use the auto-land button in the app.
Using the Camera on Your Drone
Flight skills get you in position. Camera skills get you the shot.
Gimbal tilt is your most valuable camera tool. It moves the camera from straight down (nadir, -90 degrees) to straight ahead (0 degrees) and sometimes slightly upward (+20 to +30 degrees depending on the model). For cinematic video, slow gimbal tilts combined with forward flight create those dramatic reveals that separate amateur footage from pro-level work. Quick gimbal moves almost always look bad.
Shoot in 4K even if you’ll publish in 1080p. The extra resolution gives you room to crop in post without losing quality. For most consumer drones, 4K at 30fps is the sweet spot for quality versus file size. Only bump to 60fps if you want slow-motion clips, since it doubles your storage needs.
| Setting | Recommended value | Why |
|---|---|---|
| Resolution | 4K (3840×2160) | Room to crop in editing |
| Frame rate | 30fps (normal), 60fps (slow-motion) | 60fps doubles file size |
| ISO in sun | 100-200 | Lowest noise |
| ISO on cloudy days | 400-800 | Balance of brightness and noise |
| Shutter speed at 30fps | 1/60 | 180-degree rule: double the frame rate |
| Shutter speed at 60fps | 1/120 | 180-degree rule |
| White balance | Manual: Sunny ~5500K, Cloudy ~6500K | Prevents color shifts mid-clip |
If the image is still too bright at those shutter speeds, slap an ND filter on the lens instead of cranking the shutter speed up. Think of ND filters as sunglasses for your drone. They cut light without messing with the motion blur that makes footage look cinematic.
Drone Camera Moves for Cinematic Footage
A handful of go-to moves will cover almost any location.
Reveal shot: Start with the camera pointed straight down, fly forward, and slowly tilt the gimbal up to show the horizon. Works great over water, open fields, and cityscapes.
Orbit: Fly sideways (right stick left or right) while yawing in the opposite direction (left stick) to circle around a subject. Many drones have an automated orbit or point-of-interest mode that handles this perfectly. Use it. Manual orbits are tough to keep smooth.
Pullback and rise: Start close to a subject at low altitude with the camera tilted down. Fly backward and climb at the same time while tilting the gimbal slightly up. This pulls out from the subject and reveals everything around it. One of the most versatile shots you can learn.
Top-down pass: Tilt the camera straight down (-90 degrees) and fly forward at a steady altitude. You get a map-like perspective that looks fantastic over patterns like parking lots, farm fields, winding roads, and coastlines.
Slow descent: Hover above a location and lower the drone gradually while keeping the camera angle fixed. Creates a smooth “falling into the scene” effect that’s hard to get wrong.
Drone Camera Mistakes You Should Avoid
Jumping into sport mode too early. Sport mode turns off obstacle avoidance and ramps up speed and responsiveness. It’s built for experienced pilots who need to fight wind or cover distance fast. In sport mode, the drone doesn’t stop quickly, doesn’t dodge trees, and crashes happen at full speed.
Forgetting about wind at altitude. It might be calm on the ground, but wind at 200-400 feet can be 2-3 times stronger. If the app shows a wind warning, pay attention. A drone fighting heavy headwind on the way back drains battery extremely fast and might not make it home.
Flying over water without a backup plan. Water gives the downward sensors nothing to work with, so position hold gets unreliable below 10 feet over a lake or ocean. The drone can drift. And if it goes down, it’s gone for good. Fly high over water and always keep a clear path back to dry land.
Jerky stick movements while recording. The single biggest difference between amateur and professional drone video is smoothness. Use the lightest possible stick inputs. Many drones have a “cinesmooth” or “tripod” mode that dials down stick sensitivity for filming. Turn it on whenever you’re recording.
Not formatting the SD card in the drone. Always format the card through the drone’s own menu, not on your computer. Computer formatting sometimes picks a file system that causes recording errors mid-flight. Format before every session to avoid corrupted files.
FAA Rules for Recreational Drone Pilots
Register your drone with the FAA if it weighs more than 250 grams (0.55 lbs). Registration costs $5 and lasts 3 years at faadronezone.faa.gov. Put the registration number on the outside of the drone.
| Rule | Requirement |
|---|---|
| Max altitude | 400 feet above ground level |
| Line of sight | You must see the drone with your own eyes at all times |
| Near airports | Use LAANC for authorization in controlled airspace |
| Over people | Never fly over non-participants or moving vehicles |
| Time of day | Daylight or civil twilight with anti-collision lights visible for 3 miles |
| Impairment | Don’t fly under the influence of drugs or alcohol |
| Penalties | Fines up to $27,500 for violations |
Drone Camera FAQs
What does each joystick do on a drone controller?
The left joystick controls altitude (up/down) and rotation (left/right). The right joystick handles forward/backward movement and side-to-side sliding. When you release the left stick, the drone stays at whatever altitude you set. When you release the right stick, it returns to center and the drone stops moving.
How do you take photos and video with a drone?
Hit the shutter button (usually upper right on the controller) for photos, and the record button to start and stop video. Tilt the camera using the gimbal dial on the upper left. For the best video quality, shoot in 4K at 30fps with manual ISO and white balance to prevent auto-exposure flickering.
How high can you legally fly a drone?
In the US, recreational pilots can fly up to 400 feet above ground level under FAA rules. This limit applies at all times. Going higher risks a collision with manned aircraft and can result in fines up to $27,500.
Do you need a license to fly a drone?
Recreational pilots in the US don’t need a license, but you do need to register any drone over 250 grams with the FAA ($5 for 3 years) and pass the free TRUST recreational safety test online. If you’re flying for commercial purposes, you’ll need a Part 107 Remote Pilot Certificate, which requires passing a knowledge test at an FAA-approved testing center.
Why is my drone footage shaky?
Usually it’s damaged or unbalanced propellers, high wind, or jerky stick inputs. Check your props for cracks or chips, switch to cinesmooth or tripod mode, and use the gentlest stick movements you can. If the gimbal itself is vibrating, run a recalibration through the app’s settings menu.
What is return-to-home on a drone?
Return-to-home (RTH) is an auto function that flies the drone back to its takeoff point. It kicks in when battery gets low, when controller signal drops, or when you press the RTH button. Set the RTH altitude higher than the tallest obstacle in your area, since the default 30 meters is often too low for spots with trees or buildings.