Take Your GoPro Videos to the Next Level
A GoPro is easy to pick up, but the difference between boring GoPro footage and genuinely impressive video comes down to a handful of creative techniques. Most of these tricks don’t require extra gear or advanced editing skills. They just take a bit of planning and the willingness to experiment.
If you’re still exploring what your GoPro can do, our roundup of GoPro tricks covers even more ideas. Here are five of the best techniques to try right now.
1. Hyperlapse with TimeWarp
TimeWarp is GoPro’s stabilized time-lapse mode, and it turns an ordinary walk, drive, or hike into a smooth, sped-up video that looks like it came out of a professional studio.
How It Works
TimeWarp records video and speeds it up by a factor you choose (2x, 5x, 10x, 15x, or 30x). Unlike a standard time-lapse made from still photos, TimeWarp applies GoPro’s HyperSmooth stabilization to the footage, so the result is buttery smooth even when you’re moving. Walking through a crowded city at 10x speed looks incredible. A mountain hike at 15x condenses an hour-long trail into a 4-minute clip.
Tips for Better TimeWarp Clips
– Start with 10x speed for most walking shots. It’s fast enough to feel dynamic but slow enough that the viewer can still register the scenery.
– Keep the camera mounted on your chest or a head strap for a first-person perspective. Handheld works too, but your arm movement adds extra motion.
– Tap the screen during recording to drop to real-time speed for a few seconds, then tap again to resume TimeWarp. This creates a dramatic slow-down effect in the middle of the hyperlapse, perfect for highlighting a moment.
– Shoot during golden hour (the hour after sunrise or before sunset) for warm, cinematic light.
2. Underwater Slow-Motion
GoPro cameras are waterproof (most models to 10 meters, or 33 feet, without a case), and slow-motion underwater footage is one of the most visually striking things you can shoot.
Settings for Underwater Slow-Mo
Switch to a high frame rate mode. At 1080p/240fps or 2.7K/120fps, you get dramatic slow-motion when you play the clip at normal speed. The water stretches every movement, every splash, and every bubble into something that looks almost otherworldly.
– Set the color profile to GoPro Color (not flat) for the best results underwater without color correction.
– Turn Protune on and set the white balance to Auto. Underwater light changes constantly as you move and as the sun shifts.
– If you’re deeper than about 3 feet, water absorbs red light quickly. A red filter (a snap-on accessory) helps restore natural colors in clear tropical water. In green water (lakes, rivers), use a magenta filter instead.
Shooting Tips
Get close to your subject. Water reduces contrast and clarity, especially in murky conditions. A fish or coral that looks 3 feet away will appear washed out on camera. Move to within 12 to 18 inches for the best results. Shoot upward toward the surface when you can, because the light filtering through the water creates beautiful backlighting.
3. Mouth Mount POV
This is one of those tricks that looks wild on screen. Surfers, skydivers, and skiers have used it for years, and it gives a perspective that no other mount can replicate.
How to Set It Up
You’ll need a GoPro mouth mount (sometimes called a bite mount). It’s a small, flexible piece you clamp between your teeth. The camera hangs below your chin, pointing forward. The result is a unique POV that tilts and pans naturally with your head movements.
– Use the SuperView field of view for the widest possible angle. This captures more of the scene around you and adds to the immersive feel.
– Enable HyperSmooth stabilization at its highest setting. Head movements can be jerky, and stabilization smooths everything out.
– Start recording before you put the mount in your mouth. It’s awkward to press the button while the camera is dangling from your teeth.
Best Activities for Mouth Mount
Surfing is the classic use case. The camera captures your arms paddling, the wave forming, the pop-up, and the ride, all from your eye level. It also works great for skiing, snowboarding, mountain biking, and skateboarding. Any activity where your hands are busy and a chest mount is too low makes the mouth mount a strong choice.
4. Low-Angle Skateboard and Bike Shots
Mounting your GoPro low to the ground, on the deck of a skateboard, the frame of a bike, or even a small RC car, creates a dramatic perspective that makes everything look faster and more intense.
Skateboard Setup
Attach the GoPro to the underside of the skateboard deck using a sticky mount. Point the camera forward. As the board rolls, the camera sits just inches off the ground, capturing the pavement rushing by underneath and the world towering above. Use Linear lens mode to reduce the fisheye distortion, or keep it on Wide if you want the exaggerated, in-your-face look.
Bike Setup
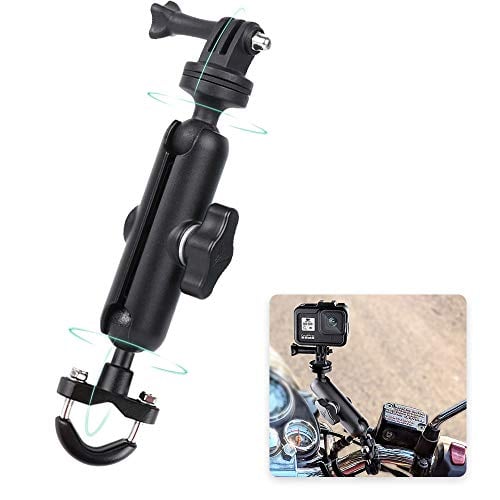
Mount the camera on the fork of the front wheel, pointing backward toward the rider, or forward toward the trail. A handlebar mount angled down to frame the front wheel and the trail ahead also works well. At 2.7K/60fps, you get smooth footage you can slow down to 50% for impact moments like drops, jumps, or tight turns.
One thing to watch for with low mounts: debris. A puddle splash, kicked-up gravel, or a muddy trail will coat the lens fast. Carry a small microfiber cloth and wipe the lens between runs.
5. Night Lapse with Light Painting
Night lapse mode opens up a completely different kind of GoPro creativity. Combine it with a simple flashlight and you can “draw” with light in your photos and videos.
Setting Up Night Lapse
Go into the time-lapse menu and select Night Lapse Photo. Set the shutter speed to 10 seconds or longer (20 or 30 seconds gives you more time to draw). Set the interval to match the shutter speed. Place the GoPro on a tripod or a flat surface. It must be completely still, because long exposures turn any camera movement into a blur.
Light Painting Technique
Stand in front of the camera in a dark environment (a backyard at night, a dark room, a campsite). Use a flashlight, a phone flashlight, a sparkler, or an LED wand. Move the light in patterns: write your name, draw shapes, wave it around in circles. Each long-exposure frame captures the trail of the light. When you play the sequence back as a video, the light drawings appear one after another.
– Use different colored lights for variety. LED wands that cycle through colors create rainbow-streaked effects.
– Wear dark clothing so your body doesn’t show up in the frame. Only the light source is bright enough to register during the long exposure.
– Work slowly. Fast movements create thin, faint lines. Slow, deliberate movements produce thick, bright trails.
Bonus: Voice Commands and Quick Editing in GoPro Quik
Voice Commands
If your hands are busy (mounted on a bike, holding ski poles, climbing), GoPro’s voice control lets you start and stop recording without touching the camera. Just say “GoPro, start recording” or “GoPro, take a photo.” Other useful commands include “GoPro, highlight” (marks a moment for easy finding later) and “GoPro, turn off.”
Make sure voice control is enabled in the camera settings under Preferences > Voice Control. It works best in quiet to moderate noise. In heavy wind or loud environments, it can miss your commands.
Quick Editing in GoPro Quik
The GoPro Quik app (available on iOS, Android, and desktop) is the fastest way to turn raw clips into shareable edits. Import your footage, and Quik will suggest auto-edits based on the best moments. You can trim clips, adjust speed, add music from the built-in library, and apply filters.
The Mural feature in Quik creates short, highlight-style edits perfect for Instagram or TikTok. Select a few clips, pick a soundtrack, and Quik does the rest, syncing cuts to the beat of the music. It won’t replace a full editing workflow, but for quick social media posts, it’s hard to beat.